-40%
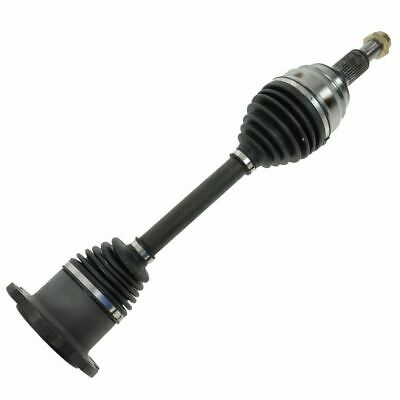
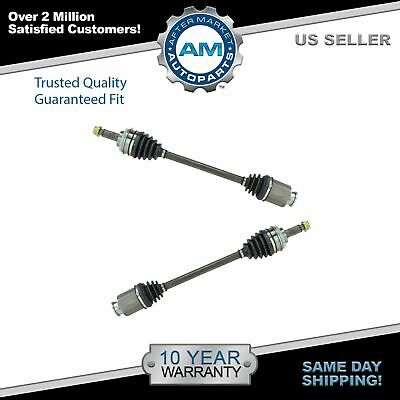
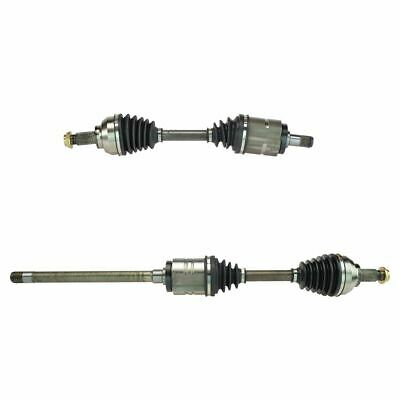
FRONT LEFT & RIGHT CV DRIVE AXLE SHAFT ASSEMBLY PAIR For MITSUBISHI OUTLANDER
$ 71.62
- Description
- Size Guide
Description
A7_CV Axle_TemplateTips:
Please message us for faster return service than opening request on ebay. Our handling time is
12 working hours
while it takes
36 working hours
by ebay system.
FRONT LEFT & RIGHT CV DRIVE AXLE SHAFT ASSEMBLY PAIR For MITSUBISHI OUTLANDER
Item Specifics
Package Included:
Pair Front Left Front Right CV Axle Shaft
Manufacturer Part Number:
FRFLNCV51553NCV51552
Manufacturer Warranty:
3 Year
Part Type:
CV Axle Assembly,CV Axle Shaft
Brand:
CV AXLE AUTO727
UPC:
Does not apply
MPN:
FRFLNCV51553NCV51552
Drive Type:
FWD
Placement on Vehicle:
Front Left,Front Right
Fitment Type:
Direct Replacement
Comment:
Please see details in "Buyers Guide" below.
OE/OEM Part Number:
MR580851,MR580853,MR580468,MR580470
Buyers Guide1:
Mitsubishi Outlander
Buyers Guide2:
MITSUBISHI OUTLANDER 2003 2004 2005 2006
Interchange Part Number:
MR580851,MR580853,MR580468,MR580470,MI-8177,MI-8125,MI-8177,MI-8125,NCV51553 NCV51552
Superseded Part Number:
MR580851,MR580853,MR580468,MR580470,MI-8177,MI-8125,MI-8177,MI-8125,NCV51553 NCV51552
Items Included:
Grease,Yes
Axle Nut Included:
Yes
Features:
CV Half Shaft , Half Axle Drive Axle ,With ABS,With Joint
ABS Tone Ring Tooth Quantity:
43
Axle Nut Thread Diameter:
M22×1.5
Performance Part:
No
ABS Type:
Teeth
Front Left CV Axle Inboard Joint Type:
Male
Front Right CV Axle Inboard Joint Type:
Female
Outboard Spline Quantity:
25,25
Inboard Spline Quantity:
27,28
Front Left CV Axle ABS Tone Ring Tooth Quantity:
43
Front Right CV Axle ABS Tone Ring Tooth Quantity:
43
Front Left CV Axle Length:
24.92
Front Right CV Axle Length:
26.69
Product Description
As one of the world's most professional automotive parts suppliers, our parts are trusted every day by mechanics and vehicle owners worldwide.This CV Axle is the optimum sliding joint for the drive shaft, of which such high performance is demanded. It is attracting attention as a constant velocity joint offering the solution to noise vibration and harshness in 4WD vehicles. Our company has developed quite a large number of these kinds of CV Axles, which can enable you to have a quiet and smooth voyage. CV Joints are assembled with a specially formulated high temperature Moly grease to resist friction and wear. New premium grade neoprene boots are used to resist abrasion and temperature erosion. All CV Joints are CNC machined with their components to ensure the proper tolerance, guaranteeing a long and dependable life. Splines are machined to match OE Specifications. All of our products must pass a strict quality inspection, we ensure the quality of our products meet or exceed OE standards.
Important !! :
When sending payment, you may also tell us your vin code (the Vin code is behind the windshield of the car) or the following information so that we can confirm again for you if needed.
Information needed if you want us to confirm for you:
(If you can provide VIN code, you may skip to Info.7, otherwise, please start from Info.1)
1. Make model year
2. Automatic transmission or Manual transmission
3. Drive Type(eg: FWD / RWD / 4WD / 2WD / AWD)
4. Engine size(eg: L4 2.4L)
5. With / without turbo
6. Non-ABS / 2-wheelABS / 4-wheel ABS
7. Transmission speed(eg: 4 speed / 5 speed / 6 speed)
8. With / without Limited Slip Differential
AXLE SHAFT ASSEMBLY
WHAT IS a CV Axle?
CV (constant-velocity) axles, (also known as half-shafts), are used in front-wheel drive vehicles to transfer the engine's power from the transaxle to the two drive wheels. Some late model vehicles with independent rear suspension and some four-wheel and all-wheel drive vehicles also use CV axles.
A CV axle has two CV joints (an inner joint and an outer joint). These joints allow the axle to transfer the engine's power to the drive wheels at a constant speed while accommodating for the different travel conditions, including the up and down motion of the suspension and cornering. Without constant-velocity joints, the axles would bind or break whenever the vehicle hit a bump in the road or turned a corner.
CV joints are packed with grease for lubrication. To keep the grease in the joint and moisture, dirt and roadway grime out, the joint is covered with a rubber boot called a CV boot. CV boots are made of a durable rubber that can withstand extreme weather and travel conditions. Good quality CV boots can easily last 100,000 miles or more. But, because they are constantly exposed to the elements, a CV joint boot can be damaged at any time. For this reason, it is a good idea to routinely inspect your CV boots for damage. If your vehicle has more than 125,000 miles - it is a good idea to check the CV joints more often.
Symptoms of a Bad or Failing CV Joint
A bad or failing CV joint will oftentimes make a clicking, popping or grinding noise, especially when turning. At low speed, a bad CV joint may make a steady knocking sound every couple of seconds or so. A bad CV joint can also cause a vibration that is felt in the steering wheel and floorboard of the vehicle - this may happen only at certain speeds.
Routine CV Axle Inspection
Inspecting a CV axle involves a visual check of the CV boots. In most instances, all you will need is a flashlight.
Follow these Steps...
1.Park the vehicle on level ground and set the emergency brake.
If necessary, lift the front of the vehicle and secure with jack stands.
2.With your flashlight in hand, slide underneath the vehicle.
If you've raised the front of the vehicle, you can slide underneath at the front center, which will enable you to see and inspect both CV axles. Or, when there is less room underneath the vehicle to maneuver, slide underneath one side of the vehicle immediately in front of or behind the front wheel to inspect one axle at a time.
3.Inspect the CV Joint Boots.
When you are in a position to see one or both CV axles, look closely at the CV boots located at each end of the axle. (Each axle has two CV boots). Visually inspect each rubber boot for cracks and tears. Also check for a damaged or missing boot clamp. For any areas of the boot you cannot see, use you finger to feel for the presence of grease. A damaged boot will expel grease onto the outside of the boot and surrounding area.
The axle passes the inspection if no visual crack or tear is seen or felt in either boot and there is no presence of grease on the outside of either boot.
Checking/Testing a CV Axle You Suspect of Being Bad
Checking and testing a CV axle you suspect of being bad or beginning to fail involves a visual inspection, a movement test and a drive test.
Follow these Steps...
1.Follow the steps above to inspect the CV axle and CV boot for damage.
If one of your CV axles is showing symptoms of being bad or going bad, you will probably see a damaged or torn CV boot when you do the above inspection. However, regardless of what you find during the inspection of the CV boots, if you still suspect you have a bad CV axle/joint, you will need to do a feel and drive test to confirm.
2.Allow engine to cool. From underneath the front of the vehicle, grab the CV axle with a firm grip and attempt to move sideways and then in and out.
The CV axle should have very minimal movement in any direction. If you are able to move the axle more than 1/8 inch in any direction, it is probably time to replace the axle.
3.Take the vehicle for a drive.
To get an accurate reading of the CV axle condition, find a smooth flat surface (such as an empty parking lot) and turn the steering wheel all the way in one direction and drive in a circle. Then turn the steering wheel in the opposite direction and drive in a circle. If one of the CV joints is bad, you will hear a popping or banging noise as you travel in a circle.
WARNING:
If you hear a CV axle popping or clicking when traveling straight, the CV joint is near the end of its service life and will completely fail soon. At this stage the CV axle must be replaced soon.
From the Manufacturer
· Designed from the ground up to meet and exceed all OEM requirements in fit, form and function. All CV Axles come with all necessary hardware for professional installation.
· Brand new construction with precision machined and heat treated center-shafts, cv joints, bearings and races.
· Manufactured entirely in our state-of-the-art ISO9001:2008 & TS1649:2009 certified manufacturing facility.
· CV Axles are manufactured with high quality neoprene rubber boots to protect against the elements on and off-road conditions and fastened with stainless steel straps.
· High quality grease withstands high-temperature and high-torque demands to ensure long-lasting, reliable performance.
How-to steps for replacing two CV joint axles
STEP 1
This is a rear drive vehicle with two CV joint axles. Start by disconnecting the battery, jacking up the vehicle and allowing some penetrating oil to soak into any retaining bolts.
STEP 2
In this case, suspension disassembly was not required. Moving brake lines and other obstacles out of the way of wrenches is a good bet before beginning.
STEP 3
Loosening but not removing the strut top mounts and sway bar end link bushings can provide a bit more suspension travel for easier axle removal.
STEP 4
Loosen and remove the wheel side axle mounting bolts.
STEP 5
Separate the axle from the wheel. Do not allow the axle to hang from the transmission or differential. Oil seals could be damaged.
STEP 6
Gently pull, pry or otherwise liberate the axle from the transmission or differential. Do not bend axle seals. Be careful not to tear the transmission or differential oil seals.
STEP 7
The axle splines on the left show damage. Note the c-clip on both axles.
STEP 8
Don't forget to transfer any axle seals, ABS rings or other parts to the replacement axles.
STEP 9
Guide the replacement CV joint axle into place. Depending on the type of retainer, the axle should click firmly in place.
STEP 10
Always use the proper torque on the axle bolts. Check axle rotation. Reassemble dismantled components.
Tips:
Please message us for faster return service than opening request on ebay. Our handling time is
12 working hours
while it takes
36 working hours
by ebay system.
FRONT LEFT & RIGHT CV DRIVE AXLE SHAFT ASSEMBLY PAIR For MITSUBISHI OUTLANDER
Item Specifics
Package Included:
Pair Front Left Front Right CV Axle Shaft
Manufacturer Part Number:
FRFLNCV51553NCV51552
Manufacturer Warranty:
3 Year
Part Type:
CV Axle Assembly,CV Axle Shaft
Brand:
CV AXLE AUTO727
UPC:
Does not apply
MPN:
FRFLNCV51553NCV51552
Drive Type:
FWD
Placement on Vehicle:
Front Left,Front Right
Fitment Type:
Direct Replacement
Comment:
Please see details in "Buyers Guide" below.
OE/OEM Part Number:
MR580851,MR580853,MR580468,MR580470
Buyers Guide1:
Mitsubishi Outlander
Buyers Guide2:
MITSUBISHI OUTLANDER 2003 2004 2005 2006
Interchange Part Number:
MR580851,MR580853,MR580468,MR580470,MI-8177,MI-8125,MI-8177,MI-8125,NCV51553 NCV51552
Superseded Part Number:
MR580851,MR580853,MR580468,MR580470,MI-8177,MI-8125,MI-8177,MI-8125,NCV51553 NCV51552
Items Included:
Grease,Yes
Axle Nut Included:
Yes
Features:
CV Half Shaft , Half Axle Drive Axle ,With ABS,With Joint
ABS Tone Ring Tooth Quantity:
43
Axle Nut Thread Diameter:
M22×1.5
Performance Part:
No
ABS Type:
Teeth
Front Left CV Axle Inboard Joint Type:
Male
Front Right CV Axle Inboard Joint Type:
Female
Outboard Spline Quantity:
25,25
Inboard Spline Quantity:
27,28
Front Left CV Axle ABS Tone Ring Tooth Quantity:
43
Front Right CV Axle ABS Tone Ring Tooth Quantity:
43
Front Left CV Axle Length:
24.92
Front Right CV Axle Length:
26.69
Product Description
As one of the world's most professional automotive parts suppliers, our parts are trusted every day by mechanics and vehicle owners worldwide.This CV Axle is the optimum sliding joint for the drive shaft, of which such high performance is demanded. It is attracting attention as a constant velocity joint offering the solution to noise vibration and harshness in 4WD vehicles. Our company has developed quite a large number of these kinds of CV Axles, which can enable you to have a quiet and smooth voyage. CV Joints are assembled with a specially formulated high temperature Moly grease to resist friction and wear. New premium grade neoprene boots are used to resist abrasion and temperature erosion. All CV Joints are CNC machined with their components to ensure the proper tolerance, guaranteeing a long and dependable life. Splines are machined to match OE Specifications. All of our products must pass a strict quality inspection, we ensure the quality of our products meet or exceed OE standards.
Important !! :
When sending payment, you may also tell us your vin code (the Vin code is behind the windshield of the car) or the following information so that we can confirm again for you if needed.
Information needed if you want us to confirm for you:
(If you can provide VIN code, you may skip to Info.7, otherwise, please start from Info.1)
1. Make model year
2. Automatic transmission or Manual transmission
3. Drive Type(eg: FWD / RWD / 4WD / 2WD / AWD)
4. Engine size(eg: L4 2.4L)
5. With / without turbo
6. Non-ABS / 2-wheelABS / 4-wheel ABS
7. Transmission speed(eg: 4 speed / 5 speed / 6 speed)
8. With / without Limited Slip Differential
AXLE SHAFT ASSEMBLY
WHAT IS a CV Axle?
CV (constant-velocity) axles, (also known as half-shafts), are used in front-wheel drive vehicles to transfer the engine's power from the transaxle to the two drive wheels. Some late model vehicles with independent rear suspension and some four-wheel and all-wheel drive vehicles also use CV axles.
A CV axle has two CV joints (an inner joint and an outer joint). These joints allow the axle to transfer the engine's power to the drive wheels at a constant speed while accommodating for the different travel conditions, including the up and down motion of the suspension and cornering. Without constant-velocity joints, the axles would bind or break whenever the vehicle hit a bump in the road or turned a corner.
CV joints are packed with grease for lubrication. To keep the grease in the joint and moisture, dirt and roadway grime out, the joint is covered with a rubber boot called a CV boot. CV boots are made of a durable rubber that can withstand extreme weather and travel conditions. Good quality CV boots can easily last 100,000 miles or more. But, because they are constantly exposed to the elements, a CV joint boot can be damaged at any time. For this reason, it is a good idea to routinely inspect your CV boots for damage. If your vehicle has more than 125,000 miles - it is a good idea to check the CV joints more often.
Symptoms of a Bad or Failing CV Joint
A bad or failing CV joint will oftentimes make a clicking, popping or grinding noise, especially when turning. At low speed, a bad CV joint may make a steady knocking sound every couple of seconds or so. A bad CV joint can also cause a vibration that is felt in the steering wheel and floorboard of the vehicle - this may happen only at certain speeds.
Routine CV Axle Inspection
Inspecting a CV axle involves a visual check of the CV boots. In most instances, all you will need is a flashlight.
Follow these Steps...
1.Park the vehicle on level ground and set the emergency brake.
If necessary, lift the front of the vehicle and secure with jack stands.
2.With your flashlight in hand, slide underneath the vehicle.
If you've raised the front of the vehicle, you can slide underneath at the front center, which will enable you to see and inspect both CV axles. Or, when there is less room underneath the vehicle to maneuver, slide underneath one side of the vehicle immediately in front of or behind the front wheel to inspect one axle at a time.
3.Inspect the CV Joint Boots.
When you are in a position to see one or both CV axles, look closely at the CV boots located at each end of the axle. (Each axle has two CV boots). Visually inspect each rubber boot for cracks and tears. Also check for a damaged or missing boot clamp. For any areas of the boot you cannot see, use you finger to feel for the presence of grease. A damaged boot will expel grease onto the outside of the boot and surrounding area.
The axle passes the inspection if no visual crack or tear is seen or felt in either boot and there is no presence of grease on the outside of either boot.
Checking/Testing a CV Axle You Suspect of Being Bad
Checking and testing a CV axle you suspect of being bad or beginning to fail involves a visual inspection, a movement test and a drive test.
Follow these Steps...
1.Follow the steps above to inspect the CV axle and CV boot for damage.
If one of your CV axles is showing symptoms of being bad or going bad, you will probably see a damaged or torn CV boot when you do the above inspection. However, regardless of what you find during the inspection of the CV boots, if you still suspect you have a bad CV axle/joint, you will need to do a feel and drive test to confirm.
2.Allow engine to cool. From underneath the front of the vehicle, grab the CV axle with a firm grip and attempt to move sideways and then in and out.
The CV axle should have very minimal movement in any direction. If you are able to move the axle more than 1/8 inch in any direction, it is probably time to replace the axle.
3.Take the vehicle for a drive.
To get an accurate reading of the CV axle condition, find a smooth flat surface (such as an empty parking lot) and turn the steering wheel all the way in one direction and drive in a circle. Then turn the steering wheel in the opposite direction and drive in a circle. If one of the CV joints is bad, you will hear a popping or banging noise as you travel in a circle.
WARNING:
If you hear a CV axle popping or clicking when traveling straight, the CV joint is near the end of its service life and will completely fail soon. At this stage the CV axle must be replaced soon.
From the Manufacturer
· Designed from the ground up to meet and exceed all OEM requirements in fit, form and function. All CV Axles come with all necessary hardware for professional installation.
· Brand new construction with precision machined and heat treated center-shafts, cv joints, bearings and races.
· Manufactured entirely in our state-of-the-art ISO9001:2008 & TS1649:2009 certified manufacturing facility.
· CV Axles are manufactured with high quality neoprene rubber boots to protect against the elements on and off-road conditions and fastened with stainless steel straps.
· High quality grease withstands high-temperature and high-torque demands to ensure long-lasting, reliable performance.
How-to steps for replacing two CV joint axles
STEP 1
This is a rear drive vehicle with two CV joint axles. Start by disconnecting the battery, jacking up the vehicle and allowing some penetrating oil to soak into any retaining bolts.
STEP 2
In this case, suspension disassembly was not required. Moving brake lines and other obstacles out of the way of wrenches is a good bet before beginning.
STEP 3
Loosening but not removing the strut top mounts and sway bar end link bushings can provide a bit more suspension travel for easier axle removal.
STEP 4
Loosen and remove the wheel side axle mounting bolts.
STEP 5
Separate the axle from the wheel. Do not allow the axle to hang from the transmission or differential. Oil seals could be damaged.
STEP 6
Gently pull, pry or otherwise liberate the axle from the transmission or differential. Do not bend axle seals. Be careful not to tear the transmission or differential oil seals.
STEP 7
The axle splines on the left show damage. Note the c-clip on both axles.
STEP 8
Don't forget to transfer any axle seals, ABS rings or other parts to the replacement axles.
STEP 9
Guide the replacement CV joint axle into place. Depending on the type of retainer, the axle should click firmly in place.
STEP 10
Always use the proper torque on the axle bolts. Check axle rotation. Reassemble dismantled components.
On May-10-22 at 23:06:51 PDT, seller added the following information:


